HOW TO ACTIVATE GLUTEN-FREE STARTER FLAKES
IMPORTANT NOTE:
Before beginning this step, please review our Gluten Free Bread Kit Guide to ensure you’re fully prepared.
The following instructions are Part 1 of a two-part series created specifically for bakers using our Sourdough Mate Gluten Free Kits.
METHOD
1. In a clean & sterilised jar, stir together 60g of lukewarm water (drinkable tap water is fine) & all of the Gluten-Free Sourdough Starter Flakes. Let this soak for 1 minute to help the flakes soften before adding flour.
2. Add 50g of White Gluten-Free Bread Flour (Wild Sourdough). Using a spoon or jar spatula, mix well until there are no more dry lumps. Take note of the consistency in the video above. You may like to add a few extra grams of water if your starter is a little on the dry side, there should be no dry patches & the dough should be well incorporated. It should not be runny but a soft & moist dough consistency (see video). If it is too runny, you will not see bubbles form when the starter activates. If too dry it can slow down activation considerably so it’s important to get this right!
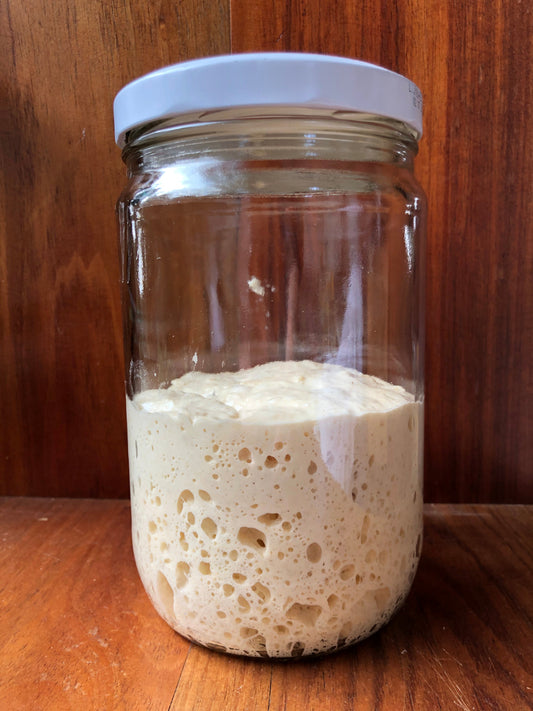
3. Let the jar sit in a warm room, (consistently 24 degrees Celsius) covered with a lid lightly screwed on. The good yeasts will start to wake up after about 24 hours you should start to see small air bubbles on the side/bottom of your jar (see image below).
Note: The temperature will dictate how fast this activates: warmer means it will be faster & cold temperatures under 21 degrees will slow it significantly & may take 3-4 days to to show any activity. So if you are doing this overnight, the temperature can drop dramatically and so will slow things down considerably. Please be patient.

What to do if it has been 3-4 days & there is no signs of activity:
Feed your starter again with 40g of flour & 40g water. Mix well and let it rest. Monitor this for the next 3-6 hours & ensure the temperature is around 24 degrees (rest longer if it is colder). If after 12 hours & there is no activity, please send a message to our website chat (bottom right corner) with photos of your starter & the last time the starter was fed & one of our support crew will do their best to assist. You can also post your questions & photos on our support group here GLUTEN-FREE SUPPORT GROUP where others bakers experiencing similar problems can share their solutions.
How do I know my start is ready?
Watch this short video to learn what to expect during the initial activation process. With more time, your starter will grow stronger. It will also grow more predictably & smell mildly sweet/sour but never acidic.
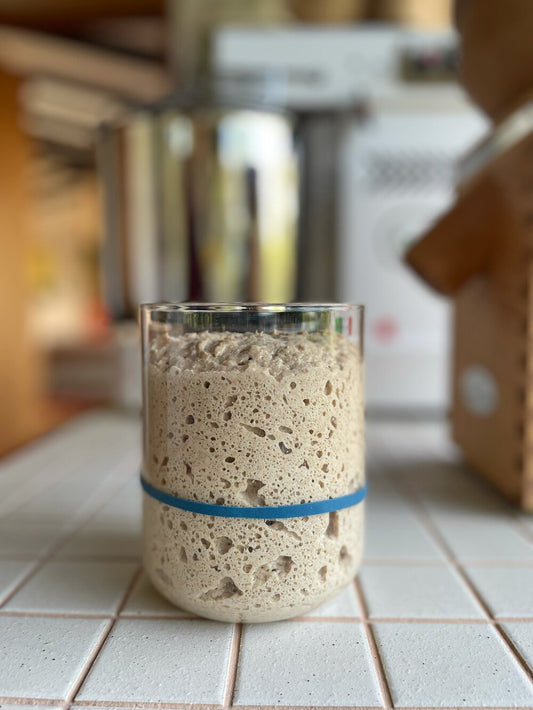
4. Once your starter is showing lots of little bubbles (see picture below), it is now active & ready to use. Proceed to Part 2 of the Gluten Free Bread Kit Guide to start baking your first loaf!
Not Ready to Bake Yet?
If your starter is now bubbly & active but you're unable to start baking at this point, you can pop the starter in the fridge in an air tight jar. It can be stored for up to 1-2 weeks before needing another feed or used to make bread. In our experience, if you are using/feeding your starter once a week it will be fine to use straight out of the fridge provided it does not smell acidic & you will need to account for extra time for the starter to come to room temperature.
If your starter is smelling acidic or like nail polish, your starter is hungry & needs a feed! You will need to discard all but 1 tablespoon & do a starter build as per the bread recipe to refresh your starter before using. You may like to do this a few times to refresh your starter.
If there is discolouring/mould or your starter is smelling off due to neglect (not feeding regularly), the starter will need to be thrown out & a new starter should be activated. To purchase another starter please head to our store.
If you would like more information on GF starters please read the following articles:
Gluten Free Frequently Ask Questions
Maintaining a Healthy Gluten Free Starter


