EASY WHOLEMEAL GLUTEN-FREE SOURDOUGH BREAD RECIPE

Active Starter
You must have an active starter before beginning this recipe. If you do not have one, please go & activated here.
INGREDIENTS
Starter Build
30g of active starter
50g White Gluten-Free Bread Flour
50g water
To make a small loaf (approximately 750g dough)
Dough
80g active starter (from Starter Build)
330g Wholemeal Gluten-Free Bread Flour
360g water
1/4 tsp salt*
To make a larger loaf (approximately 950g dough)
100g active starter (from Starter Build)
400g Wholemeal Gluten-Free Bread Flour
440g water
1/4 tsp salt*
*Please note the Wholemeal Gluten-Free Bread Flour contains 1% salt so it is optional if you would like to add additional salt. This is a suggestion but if you would like less salt, please leave out.
Optional additional ingredients to try:
- 12g apple cider vinegar: assists with fermentation & flavour
- 20g olive oil: creates a softer loaf
- 12g natural sweetener of choice: speeds up fermentation & obtains a darker crust
- 1 tsp instant dried yeast: speeds up fermentation, creating a lighter loaf (hybrid sourdough bread)
INSTRUCTIONS
1. Starter Build (optional)
If you have come straight from Part 1 of the Bread Kit Guide & your starter is active & has bubbled, you can use this starter to add to your bread mix. Move to step 2. There should be enough to use in this recipe & some left over to feed & make more bread or store in the fridge for later use. Never use all your starter to make bread, always keep a tablespoon (30g) to keep alive, it is now a living thing that you must keep alive!
For more information on storing your starter in the fridge or keeping your starter alive please head to our Gluten-Free Starter Maintenance page to learn more.
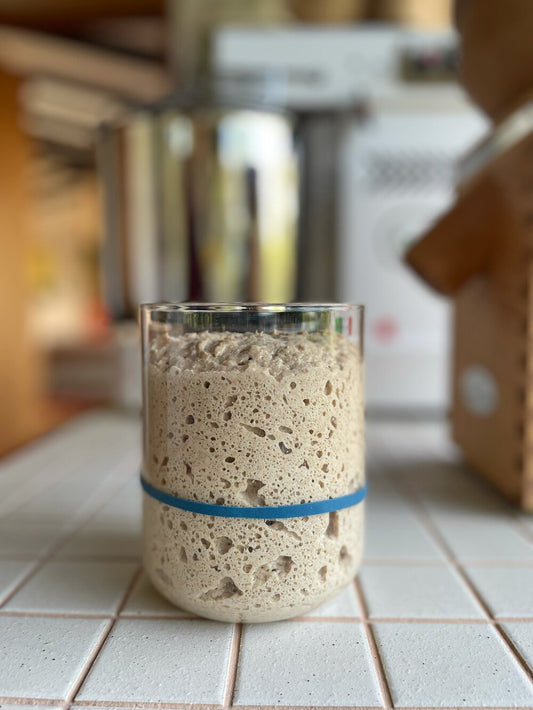
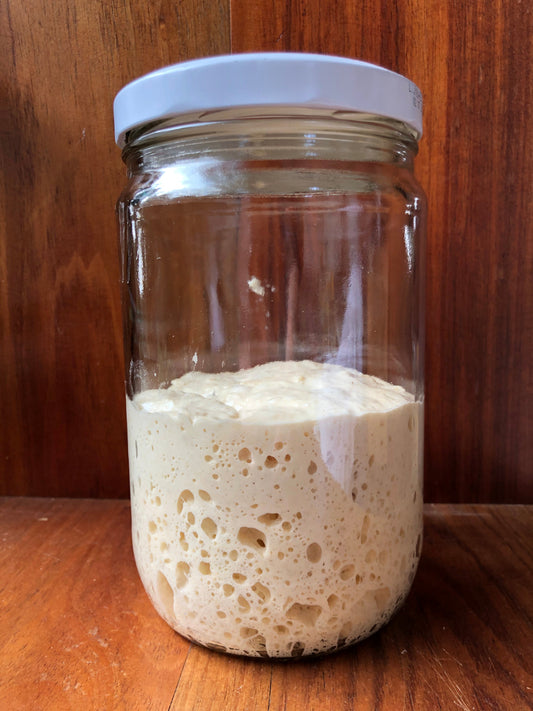
To do a starter build, you will need to take 1 tablespoon or roughly 30g of active starter & feed it 50g GF White Flour & 50g of water (you may need a few more grams if your starter is dry, please try and get a smooth but not runny consistency). Stir until well combined & cover to let it rest at 24 degrees Celsius until bubbles start forming at the bottom of your jar & it should grow to about 30-50% from its original size. It is ready to be used in your bread mix.
How do I know my start is ready to use?
Watch this short video to learn more.
2. Make the Dough
In a large bowl, combine all of the ingredients & mix well using a dough whisk. Then knead the dough by hand for 10 minutes until you have smooth dough.You may use an electric mixer* if you have one, scraping down the sides as you go.
*If using an electric mixer, use a flat beater as shown in the video) on medium until thoroughly combined (min. 5 minutes). The dough will tend to clump together into a ball & get trapped between the flat beater, you will need to scrape it down regularly (2-3 times) & continue mixing until smooth.
Let the dough rest (covered) for 30 minutes to thicken.
3. Shape the Dough
Unlike gluten breads that require delicate handling & special fancy shaping techniques, shaping gluten-free dough is very simple. It's important to note that the dough should not be sticky at this point, if it is, than it may be too wet or a flour other than our bread blend was used.
Pour/scrap the dough out on to a bench. No need to flour the bench. Pat out all the air bubbles & smooth out any wrinkles or cracks. Shape into either a smooth round/oval as seen in this video. Flour the top of the dough, continue to smooth it out.
You can either lightly flour your shaped dough or roll it in mixed seeds (sesame, sunflower, pumpkin, flax) before placing it smooth side down. Press gently down on the dough to help fill the banneton.
Take note of the height of the dough & where it sits below the banneton. This will allow you to make a growth comparison in the next step.
4. Rest & Final Prove
Allow the dough to rest & prove inside the banneton until it has just doubled in size or "domed" as per the vidoe. This can take up to 8-14 hours (depending on the temperature in your kitchen: colder will be longer, warmer will be shorter).
FAQ: When do I know it's ready to bake?
It’s important this process is not rushed or forgotten about: both an under/over proved dough will be denser & not have the desired oven spring when baked. Still not sure, watch this video.
5. Pre-heat Oven
Place a Dutch oven* with lid on (or baking steel or stone) into the oven and preheat it to 250 degrees Celsius for 30-45 minutes.
*We recommend using a Dutch oven with a lid as it creates the perfect steam environment to give the bread excellent oven spring.
6. Bake the Bread
With Dutch Oven (recommended)
If baking with a Dutch oven, carefully & gently turn out your dough onto a pre-heated dutch oven. Take your lame & score your bread (this help the bread to expand properly inside the oven). Place a couple of ice cubes inside and close the dutch oven lid. Bake at 230 degrees Celsius for 30 minutes with the lid on.
After 30 minutes take the lid off (if using a Dutch oven) & turn the oven down to 230 degrees Celsius & bake for a further 30 minutes (higher/longer if you prefer a golden brown crust). This will vary depending on your oven & preference.
Without a Dutch Oven
If baking without a Dutch oven, turn your dough onto a baking steel or tray with baking paper. Spray with water and place a couple of ice cubes and close the oven door. Bake at 230 degrees Celcius for 60 minutes.
Cool Down
Once finished baking & your loaf is at the desired colour, remove the bread from the oven and allow it cool (min. 25 minutes) before slicing. As tempting as it is to cut it while it's hot, this step is important to allow the inside to fully cook through.
FREQUENTLY ASKED QUESTIONS - GLUTEN FREE SOURDOUGH
Can I add inclusions like seeds, fruit, oils & sweetness in my bread?
Yes, you can get creative here! Our recipe is designed to help you grasp an understanding of baking with sourdough & we recommend experimenting with additions when you're ready.
Suggestions:
- Instead of dusting your shaped loaf with flour, try rolling it into some mixed seeds (whatever works) and then let if prove before baking.
- Add about 20% fruit & a couple of teaspoons of mixed spice to make fruit bread. Simply soak your fruit overnight, let it drain & absorb any extra liquid with a paper towel before adding into your bread mix.
- Extra virgin olive oils are great for creating softer breads, just ensure you adjust the water accordingly. Example, if you add 20g of oil, than reduce your water by 20g.
- Sweeteners like sugar, coconut sugar, rice malt, maple syrup can add sweetness to your loaf if you prefer, just add 1-2 tablespoons.
NEED HELP WITH YOUR GLUTEN-FREE BREAD JOURNEY?
We’ve also started an open group to help anyone wanting to learn, why not join today Gluten-Free Facebook Support Group & start enjoying freshly baked gluten-free sourdough bread at home?


